Sprache umschalten:  |
|
home |
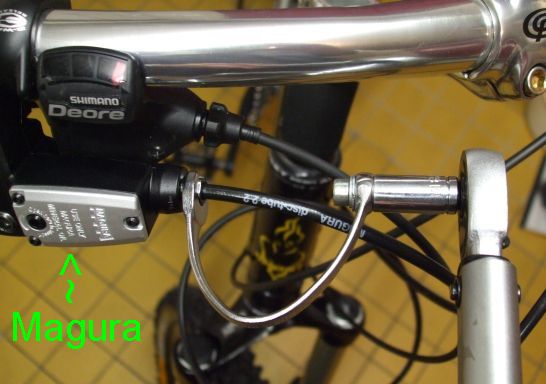
Attaching a Magura brake line to the brake lever - without damaging the thread
Disclaimer:
This is a hobby page. The suggested solution works for the author but is not guaranteed to be workable or safe for you. Do this at your own risk.
This is not the Magura manual. For installation or servicing your Magura brakes, refer to the proper documents provided by Magura.
The Problem
When attaching the brake line to the brake lever, the thread in the brake lever body is easily damaged. This is because a certain minmium force is needed to compress the olive while too much force harms the thread. Damage is easily done to the cheaper brake levers made from plastic material (Julie, HS11).
Pitfall
There are 2 critical steps when attaching a brake line to the lever:
- The locking bolt that secures the line must be properly inserted into the thread on the brake lever body. Destructive cross threading easily happens. To find the start of the fine thread, turn the bolt anti-clockwise until you sense the click.
- Do not overtighten the bolt, use a torque-limiting wrench.
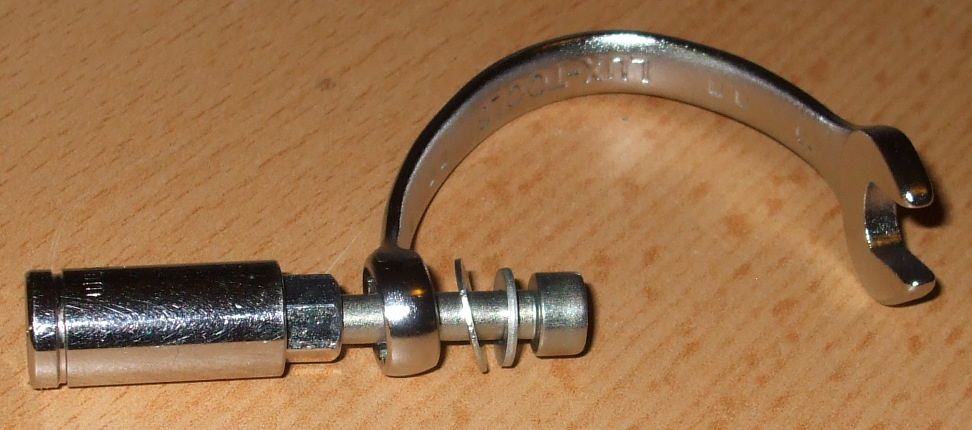
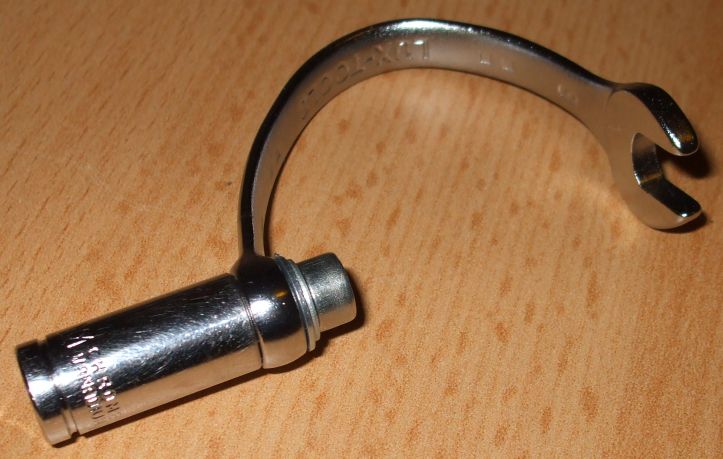
Doesn't sound complicated, but how to fit the nut driver of the torque wrench when there's a brake line in the way ? Special torque wrenches accept open-jaw attachments, but these are hard to come by and they are not cheap. I have made a special tool that works well with a standard torque wrench:
This tool can be quickly built from material available at your local DIY store. It's what this page is about.
Making an Adapter: 1/4" Torque Wrench to an 8mm Open-Jaw Wrench
Partlist:
- 8mm combination wrench
Its uncommon shape (picture) has been achieved by applying brute force. A cheaper wrench makes life easier. Both ends need to be aligned so that a bolt can pass through both at an angle of 90º.
- M5 long nut
- M5 bolt
- 8mm 1/4" nut driver
Pick one that does not allow the M5 bolt to reach fully through. Typically, these are the cheaper ones.
- Washers
Assembly is straightforward:
- Drill out the thread of the long nut
- Shorten the long nut, so it has just the right length to connect the nut driver and the wrench
- With an M5 tap, cut a thread into the narrow part inside the nut driver (M5 bolt doesn't reach through, so this is possible)
- Cut the bolt to the size needed for holding washers, long nut, wrench and nut driver together
- Apply Loctite Red, assemble (refer to photo) and tighten
Done:
home
